
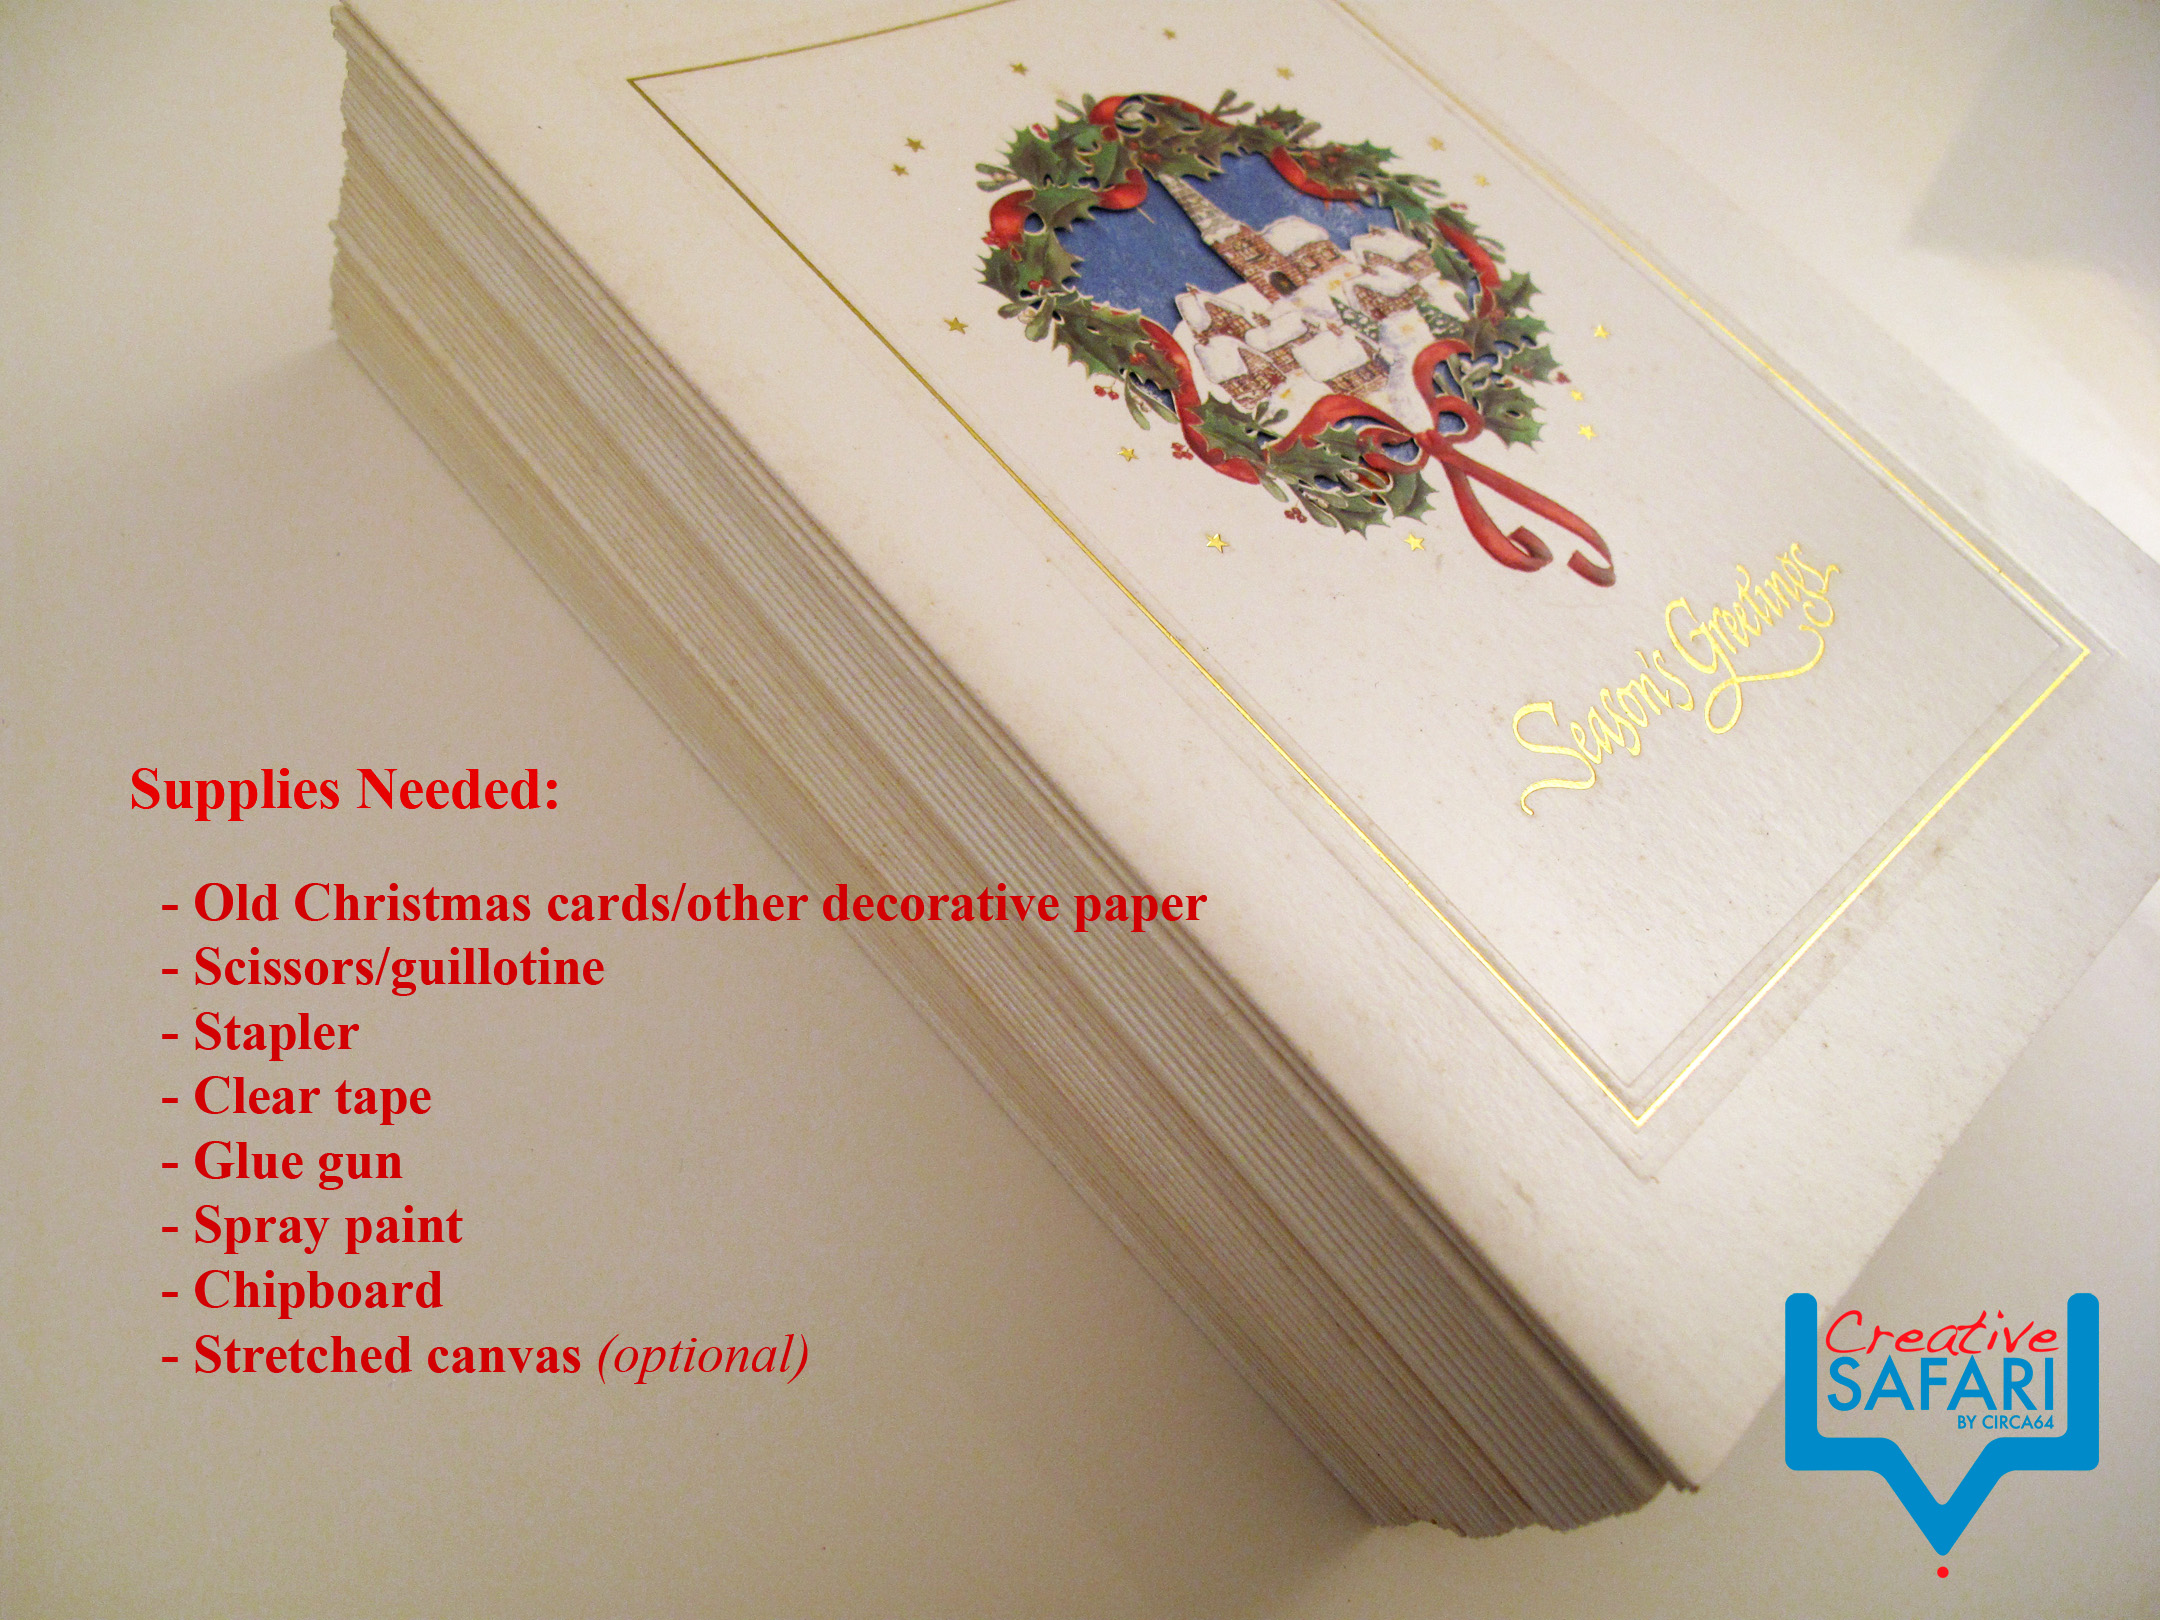
I had a box of old, unused greeting cards, that I had been saving for a while. The plan was to recycle them with a fun DIY project, and I finally got around to it. I decided to recycle them into a pretty Paper Dahlia Flower.
Steps below…enjoy!
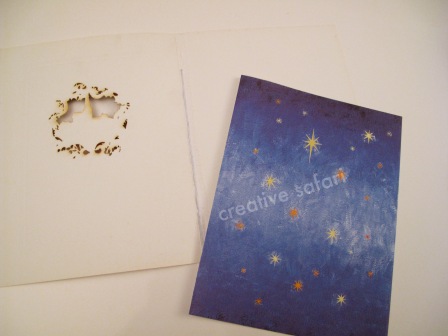
Step 1: I took out the folded (inner) patterned sheet – to make the cones for creating the dahlia.

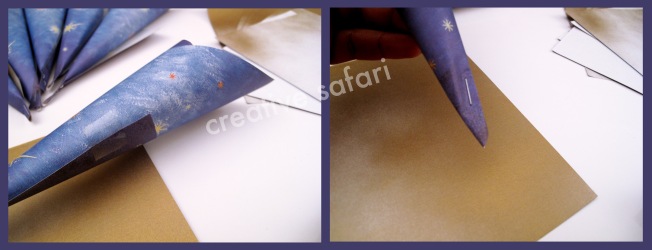
Step 2: Trimmed off the white half

Step 3: Gold spray paint! Because the backside of the patterned sheets were white, and I wanted colour for the inside of the paper cones, I decided to spray paint them gold. I only sprayed the top of the sheets, since that’s the only part that’s visible after twisting into shape.
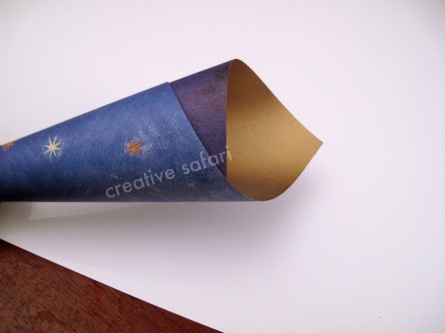
See? Much nicer with the gold finish!
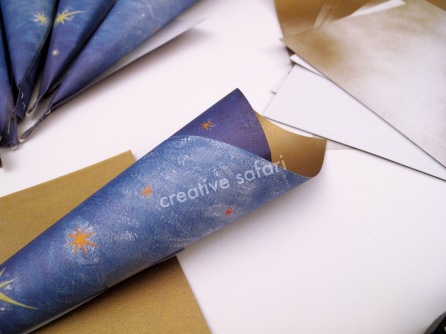
Step 4: I twisted each sheet into a cone shape, used a piece of tape on the flap, and stapled the bottom to hold it in place.
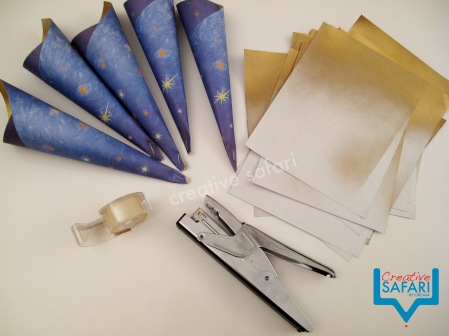
Cone-making assembly line *whistling while i work*

All twisted up and good to gooo! I absolutely love the two-tone/ombre-ish effect from the blue patterned sheets. Add the gold innards (yes), and it’s colour-tastic!

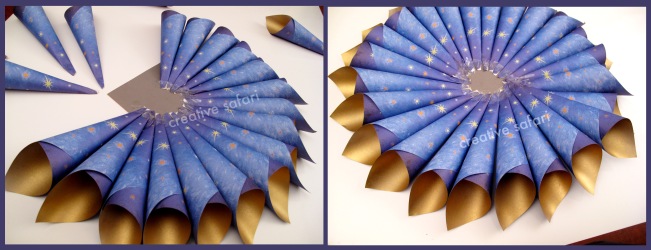
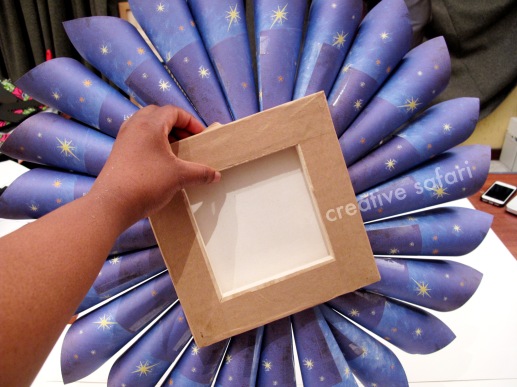
Step 6: I cut a piece of chipboard, big enough for the size and number of cones.
Step 7: Started taping ’em down. (If you’re sure of your placement, then use hot glue.)
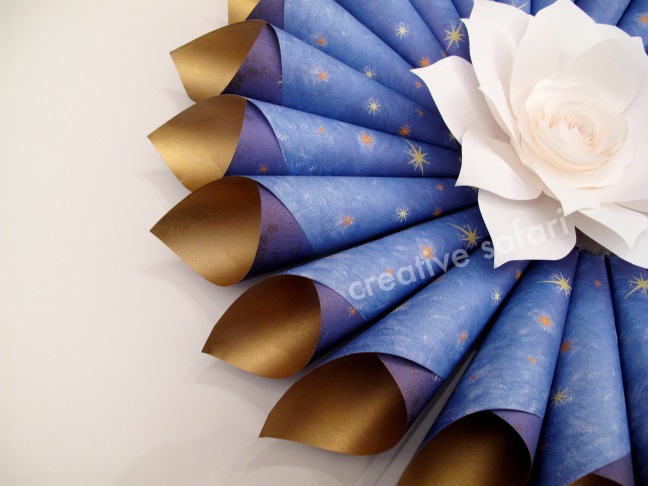
At this point, I liked the one layer look a lot, so I decided against having another 2 or 3 layers of cones. Instead…I plunked a pretty paper flower in the middle of that bad boy.
Whoop!!
I stuck the whole gbogbo everything onto a mini canvas to make it easy to hang up.
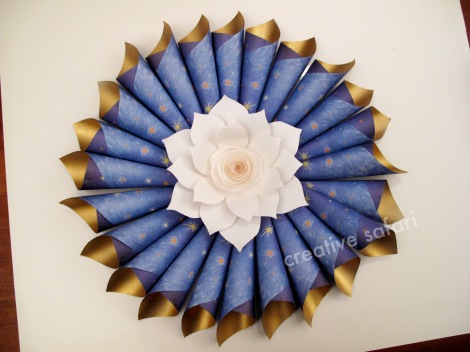
And Voila!!
This will work great as a party decor piece. Try it in shades of red and pink for a Valentine’s Day version!
Happy Crafting!!

Lovely!
Thank you OO
Jaw droppingly awesome!
Thank you Mide!